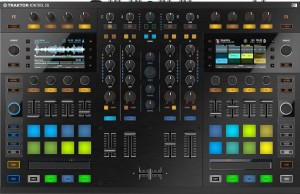
Essential Music Production Vocabulary

Xavier Capdepon Music Production TipsXavier Capdepon has been producing music for almost 5 years now, so he has had to learn the vocabulary to improve his discussion quality with other producers and more importantly improve his own production abilities. As a music producer, it is vital to know the vocabulary that the best in the business use. Below are some essential music production vocabulary that all music producers should know.

  • Fade in/Fade out – This term refers the the increasing or decreasing of the volume on an audio clip. This typically occurs at the beginning or end of audio clips, as most music software allows you to automate fades at the beginning or end of audio clips. This allows for a smother transition between your audio clips.
  • Compressor/Limiter – These are standard music production audio effects that allow the producer to control the dynamics (intense swings in volume) of their audio recording or musical performance. A limiter is set in place to limit certain volumes of sound. A compressor is closely related to a limiter, but there are options to make the volumes coincide with other track volumes.
  • Reverb – A reverb is a popular audio effect that are added to audio tracks to simulate sound bouncing off the walls in a small room. This is a way to increase the space of a particular sound and keep it from sounding too flat. A reverb is defined as amount of time it takes an audio signal to bounce off of a wall (or something else) and return to the listeners eardrums.
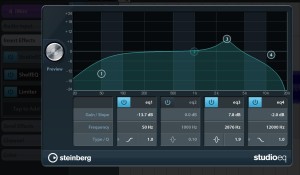
  • EQ (equalization) – Different sounds have different frequencies. For example, bass sounds have lower frequencies, and melody sounds tend to have higer frequencies. EQing adjusts the amplitude of audio signals at particular frequencies, and producers use this to get rid of certain unwanted frequencies on various sounds. 
  • Mixing – mixing is used to distinguish each sound on a different track. A mixing console is used to mix sounds of various microphones that you would have set up in a studio. Producers want to have audio coming from multiples sources so they can mix them together and make them sound clear. The different channel strips assigned to the various microphones allow the producer to arrange the volume and tone of each channel.

To read more about how Xavier Capdepon sets up his production schedule, read more on his last blog post here.

The Three Pronged Approach to Music Production

Xavier Capdepon Music ProductionOne of the most difficult aspects of music production is getting caught in all of the small detail that can keep you working on a song for much longer than anticipated. This is something that I like to call the music producer’s “black hole.” A producer’s “black hole” is something that all young producers have a problem with these days. They will spend hours trying to perfect a synth or kick drum, which ends up wasting time and energy. One method that a lot of producers use is to split up your music production in three deferent processes.
The first process is the creation. This is when you first start out, figuring out which instruments, synths, and drums you will be using for your song. Get creative with your sound design and focus more on the structural elements rather than how the sounds are meshing together during the first process. Three main questions to consider are:

What kind of emotion do you want to evoke?

What tempo and energy level do you want to have?

What are the main sounds that you want to focus on?

The second process is the mixdown. This portion of the production process can easily take up a lot of time during the creative process. When you find yourself tweaking small aspects during the creative process; stop, remember the three separate processes, and continue with the sound creation. It’s important to let your song sit for a while after the creative process, so the producer can listen to his creation with fresh ears and a new perspective. The main audio effects that a producer focuses on during the mixdown are the volume levels, compression, and EQ.

The third and final process is the mastering. Normally producers do not do their own mastering. If you are a producer that does his or her own mastering, then you are repeating the steps before the mixdown. Save the mixed track, so you don’t get lost between mixing and mastering.

5 Crucial EQ Tips to Clean Up a Muddy Mix

Even a perfect composition will sound bad with a muddy mix, so corrective EQ tactics are absolutely essential to getting the right sound. Follow these 5 steps to cleaning up your mix and getting each track to shine through with clarity.

Xavier Capdepon music production EQEmphasize What Matters: Open up your equalizer and figure out where the meat of each sound sits. You’ll notice that your sub-bass peaks at the very low end of the spectrum so any high end frequencies you let through are not serving a useful purpose. In fact, they’re just taking up space and competing with your other sounds. Similarly, any low frequencies you let through from your hi-hat track are just going to interfere with your lower sounds, resulting in a muddy mix. Go one by one through your tracks and carve out unnecessary frequencies to give each track its own space to shine.
Roll Off Highest Frequencies: Even sounds that are supposed to live on the high end of the frequency spectrum can use some high-end roll-off. The idea is to take away some of the very highest inaudible frequencies that can make things muddy. Here, less is more — you don’t want to roll off important high frequencies that might add to the atmospheric feeling of your song. Just roll off enough until you can start to hear the difference and then back off slightly.

High-Pass (Almost) Everything: The more room you leave in your low end of the spectrum, the better your sub can break through the mix. It’s really as simple as that. A hi-hat lives in the upper frequencies, so don’t let low-frequency audio fragments compete with your sub bass. There’s no hard and fast rule for high-passing everything, but you can roll off the lowest 60 Hz on most tracks without a problem. Of course, your hi-hats will need more roll-off while your vocals and bass will need less.

Notch Out Problem Frequencies: Within the important range of a sound, there are often “problem frequencies,” or tiny frequency bands that give uncomfortable resonances. Use the notch band in the EQ like a surgeon would and cut out those problem frequencies to give your audio a fresh makeover. The easiest way to do this is to play the track and then slowly sweep through it with one high peak in your EQ until you get to something that makes you cringe. Notch that frequency out and move on to the next one.

EQ Tracks in Tandem:  Arguably, the two most important components of any EDM song are the bass and the kick. If those two aren’t sitting well together in the mix, no amount of work will make your song sound good. But getting sounds to mesh well together is as much an art as it is a science — you’ll need to experiment by subtly boosting some frequencies and lowering others until you get the right feel. I recommend doing this at the start of your track before you move forward with the rest of your composition and finer details.


How to Properly Layer your Music Like the Pros

Are your synths coming out flat no matter how wide you push them or how well you saturate them? Or perhaps you struggle to get your claps to sound as full as the pros. Electronic music producers commonly face these kinds of issues and it can be exceptionally frustrating when your hard work doesn’t sound the way you want. The answer is often a matter of a layering.

Xavier Capdepon Layering Music ProductionThe What:
At its core, layering is actually quite simple. It involves taking one sound and placing it on top of another to access a richer combination of sounds and fill up a greater spectrum in the frequency range. In practice, layering is a little more complicated because it involves quite a bit of trial and error with different sounds, the EQ, and other audio effects.

At first this will require some patience as you figure out what sounds mix well and which ones are unpleasant. But over time you’ll learn where certain sounds sit on the frequency spectrum and what extra sounds will help to fill them out and add richness and fullness.

The How:
The first step to layering is to understand where your current sound sits. Pull out an equalizer and see where the heart of your sound is primarily peaking. Then use your equalizer to highlight the important range and turn down the less important parts. In other words, you don’t want to make one sound shoulder the responsibility for the entire frequency range. Give sounds a chance to collaborate with each other and you’ll be surprised by the results.

Sometimes this can be as simple as trimming off the lowest frequencies in a bass synth and tacking on a separate sub bass to provide that lower warmth. Other times you may want to add a different type of sound on top of your first one to give it more complexity and richness. You can even duplicate the same sound a couple of different times — called stacking — and change certain parameters on each one to make things more interesting for your listener.

What’s Next:
Once you have different layers that focus on different frequencies in the same sound, you have much more flexibility to boost something here and reduce something there. You can add huge reverb and width to the top end of a synth but keep the low end nice and centered. You can give your clap a solid crack in the low to middle frequencies and still have an interesting high end decay. Perhaps most importantly, you can mix different sounds together to get a unique timbre that nobody else has used before.

Layering is certainly not something to be restricted to synths alone. Vocals, drums, and pretty much any other type of sound can benefit from this layering technique. The magic of EQing requires a whole other blog post, but these are the basics. Stay tuned to learn more!

Native Instruments’ New Traktor Kontrol S8 MIDI Controller

Xavier Capdepon Music ProductionNative Instruments’ Traktor Kontrol S4 MIDI controller has been a staple product in the DJ world. As time goes on and technology continues to develop, new products come into the market that push the Traktor Kontrol S4 to the side. What is Native Instruments’ response? They create the next product to top the charts in the DJ game. Native Instruments are now coming out with the newest product in their Traktor DJ equipment line, the Kontrol S8.
The new MIDI controller is receiving high praise from renowned DJ’s such as Carl Craig and Luciano. The new features that are of importance are that Native has taken out the standard job wheels that you see on most DJ controllers. They have added a built-in display instead of the jog wheels. The display consists of track and sample decks with four channels with their own separate volume faders. There are eight new performance pads and a BPM knob has ben added as the tempo fader are fading out. Replacing the jog wheel is the increasingly popular touch strip (as seen on the Novation Twitch).

More and more turntables are doing away with the standard jog wheel as DJs are looking for a more practical way to manipulate sounds and mix tracks. The jog wheel is reminiscent of the original turntable using venal records. Now that technology is changing, so are the times. Jog wheels are reminiscent of the old days, as they are not necessarily practical to the current DJ world. DJ’s are trying to push possibilities and creativity in their sets, and this is exactly what Native Instruments’ new Kontrol S8 is trying to accomplish. Traktor is shaping the future of DJ equipment as DJs will soon be able to leave their computers on the side and only work on their sets via the MIDI controller.

Take a look at the trailer below for a better sneak peek.


Ableton Live vs. Pro Tools – Music Production Software

Xavier Capdepon Ableton LiveIn this blog, I will be discussing general music production tips and tricks along with reviews on production tools and software that I have used before. One of the most difficult aspects of music production is mastering. Creating melodies on a couple of drum loops is one thing, but making sure that each sounds is at an optimal volume, frequency, and depth, while working off of each other, is a whole other art form. I am still a young producer myself, and I have a lot more to learn in the art of mixing and mastering.

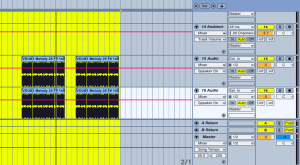
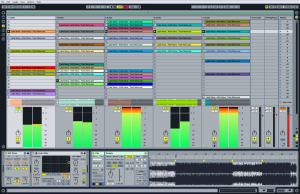
The production software that I use is Ableton Live. Many popular artists such as Pretty Lights, Richie Hawtin, Armin Van Buuren, Kaskade, Diplo, and M83 use Ableton Live. I have used Pro Tools, Logic, and Reason; and I have to say that Ableton Live is my favorite by far. The interface is inviting and a lot simpler to understand. I have found that Ableton is a lot more user friendly than Pro Tools, Logic or Reason. Ableton and Pro Tools are the industry favorites, so I will go into a little bit of comparing and contrasting between the two. Pro Tools is better for live recordings and studios handling a lot of audio. There are more options in Pro Tools for audio manipulation and postproduction effects. You are more easily able to manipulate and work directly with the audio waveform and better compressing for vocals. Ableton is better for creating electronic dance music with MIDIs, plug-ins, FX and processing. Ableton is better for real-time play, as the user is able to DJ between multiple sections of audio at the same time. In this light, Ableton is more fun to use, as there are multiple modes of audio manipulation, looping, and sequencing that can all be done in real-time.

Hello world!

Welcome to BrandYourself Concierge Sites. This is your first post. Edit or delete it, then start blogging!